Perforated Decals
Step-by-step instructions for Custom Static Window Clings and Signs

Step 1 : Clean surface area thoroughly with denatured alcohol for best results, other window cleaners can be used also. Dry working area completely with paper towel or cloth.

Step 2 : With masking tape, tack graphic on glass as shown. Always double check measurements before applying. Masking tape on center top and bottom will be used to create a center hinge.

Step 3 : Remove masking tape carefully from left and right side. Gently fold over either side onto its self. Form a gentle crease. Larger applications may require two people.

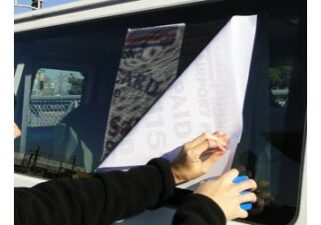
Step 4 : Gently peel perforated material away from liner as shown.

Step 5 : Cut liner with a scissors or razor blade (do not tare liner) and discard.
Step 6 :

Step 6 : Lift and begin to apply perforated material with blue applicator (squeegee) supplied. Be gentle.

Step 7 : Gently apply perforated material with squeegee, always squeegee from center to outer edges.

Step 8 : Gently squeegee, be careful material can tear easily it perforated.

Step 9 : Gently squeegee, be careful material can tear easily it perforated.

Step 10 : After one side is down, remove masking tape carefully and fold remaining side onto the other side as shown.

Step 11 : Remove remaining liner and discard. Make sure not to let graphic stick to its self.

Step 12 : Gently squeegee down the rest of the graphic.

Step 13 : Gently squeegee down the rest of the graphic.

Step 14 : Firmly squeegee down application after it is stuck down, gentle but firm.

Step 15 : Finished.

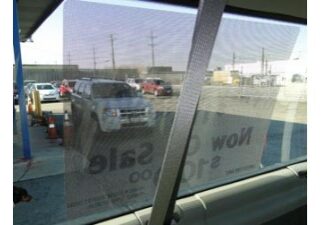
Step 16 : View from the inside, as you can see almost invisible.

